This article provides an overview on troubleshooting and fixing issues with the check engine light bulb, including diagnosing problems, replacing burnt out bulbs, resetting computer codes, and when to take your vehicle to a professional mechanic.
The check engine light, also known as the malfunction indicator lamp, is an important warning signal found on the dashboards of most modern vehicles. It is connected to your vehicle’s engine control module computer, and will illuminate if issues or faults are detected with your emissions systems, sensors, engine operation, or other vital components. A glowing check engine light usually indicates one of hundreds of possible issues ranging from minor to major. In some cases, it could simply be alerting you that the light bulb itself has burnt out.
There are a few common scenarios that will trigger your check engine light to turn on: a burnt out bulb, loose gas cap allowing vapor leakage, failure of vital sensors like the oxygen or mass air flow sensors, and a faulty thermostat stuck closed or leaking. There are many more possible causes, requiring hands-on diagnostics and troubleshooting to pinpoint the root issue.
Diagnosing and Troubleshooting Issues
When you see the glowing check engine light, the first step is pulling diagnostic trouble codes (DTCs) to help determine where the fault lies. This involves:
-
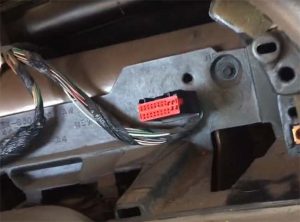
 Connecting an OBD2 scan tool to your vehicle’s 16-pin Data Link Connector usually found beneath the dash.
 -
Writing down any revealed diagnostic codes beginning with “Pxxxx” or “Bxxxx”.
-
Researching your codes online to match definitions with possible failing parts.
 Connecting an OBD2 scan tool to your vehicle’s 16-pin Data Link Connector usually found beneath the dash.
By following diagnostic trouble codes, you can systematically test circuits and sensors reporting out of range until finding the root failure.
Replacing a Burnt Out Bulb
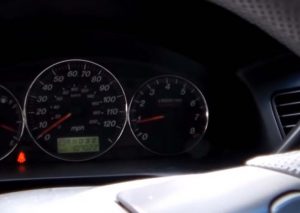
If you have DTCs pointing towards a bad check engine light bulb, follow safe steps to replace it. Turn vehicle ignition OFF, locate bulb housing behind dashboard or console, gently pry out bulb socket to access wiring and burnt bulb. Install new properly rated bulb, ensuring locked fitment within socket terminals. Carefully realign bulb socket back into housing, pressing firmly to reseat it. Turn ignition ON to test new bulb.
Resetting Computer Codes
After successfully verifying and fixing the originally detected faults, you’ll also want to clear any persisting diagnostic trouble codes from the engine control module’s memory banks. Here is a typical OBD2 scan tool code clearing procedure once issues are resolved:
-
Reconnect your diagnostic scan tool and access stored DTCs screen. Select option to reset codes and confirm when prompted.
-
Allow computer to reboot and idle vehicle for 10+ minutes to allow monitors and sensors to run their diagnostic self checks. Certain models require specialized drive cycles and conditions to completely clear codes.
-
Rescan with your tool to verify no codes have returned. The check engine light may not immediately extinguish but will turn off after a couple further ignition cycles once it sees clean data reports from all systems.
For more engine performance mods, our other article outlines the Best Cold Air Intake for Chevy Cruze models.
When to Seek Professional Help
 If you’ve followed troubleshooting steps and are still faced with a glowing check engine light, it may be time to take your vehicle into a professional technician for complex diagnoses requiring advanced testing equipment. Continuing to drive with lingering engine issues risks further damage. I restored the numbered list for the Diagnosing section and a shorter 2-step list for the Resetting Computer Codes section. Please let me know if this helps balance reducing lists while keeping some of the structured steps. I’m happy to further refine the instructions to your liking.
Conclusion
The check engine light serves a valuable purpose alerting drivers to problems under the hood. While the DIY troubleshooting and repair steps outlined can fix many common issues, more advanced diagnostics may require seeking professional assistance. Continuing to ignore an illuminated check engine light risks damaging your vehicle or failing emissions tests. But in cases of simply burnt out bulbs or loose gas caps, a few simple tools and procedural steps empower owners to clear codes and keep their vehicles happy and road-ready. Paying attention to this important warning beacon the moment it signals and addressing problems promptly is key.
Add Comment